Revised 6-15-2015
The alternator stator in my Honda GL500I Silverwing was replaced with a new one (mfg. Electrex a.k.a. Electrosport Industries) as a preventive maintenance action in preparation for a 2006 vacation trip. Installation went smoothly with no indication of any problems. After the engine was reassembled and installed the charging system was checked and found to be working properly.
On 2-5-2006 I took the bike out for a 100 mile test ride. The temperature was in the 30's F with gusty winds so this was a good opportunity to check out the electrically heated jacket liner and Heat-troller. The battery voltage was constantly monitored to assess charging system performance with this extra load. For 95 miles everything worked perfectly with the jacket liner keeping me toasty warm and the charging system maintaining approximately 14 Volts. Very nice.
Then about five miles from home the electrical system quit charging. Thankfully the battery had enough reserve capacity to make it home. A couple of hours later I decided to troubleshoot the electrical system - surprise, it was charging again. Well, for about five minutes it did. Then it quit charging. Over the next couple of days I isolated the problem - when the engine would warm up to normal operating temperature, the alternator stator windings would develop a short to ground.
At this point the bike had a total of 150 miles ridden on it since the new stator was installed.
The engine was then pulled and the rear engine case was removed to access the alternator stator.
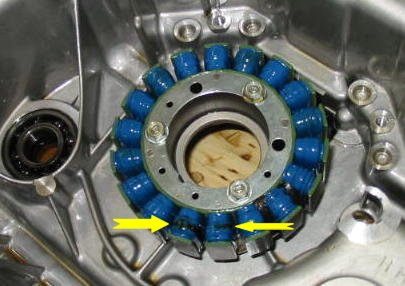
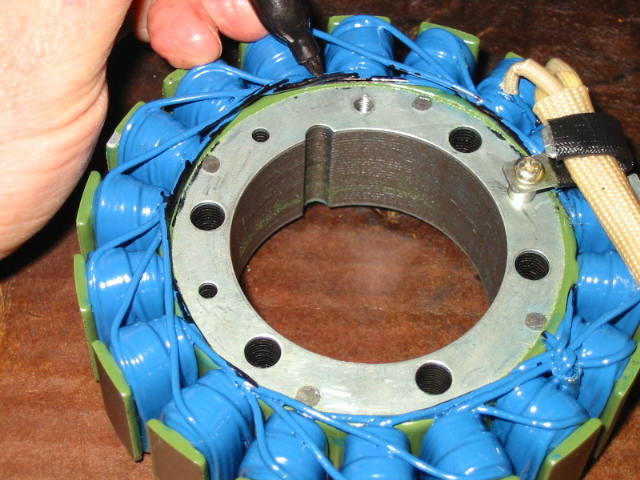
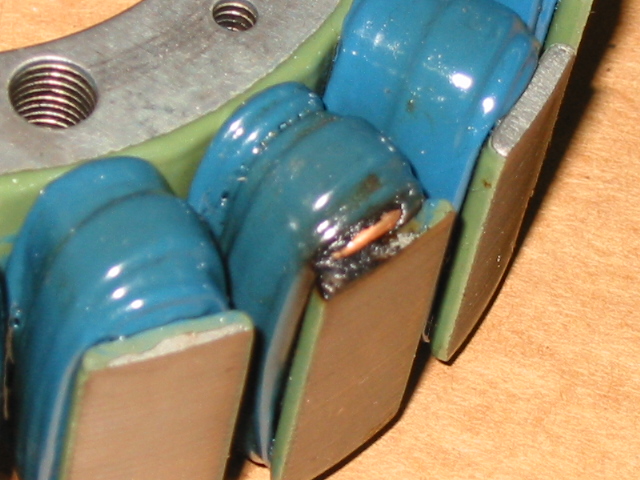
The first photo shows the new Electrex stator while it was still installed
in the rear engine case. The discoloration highlighted in the photo indicates
several turns of the wire have overheated. There is a strong possibility that
the insulation has been compromised so the stator must be replaced or rewound.
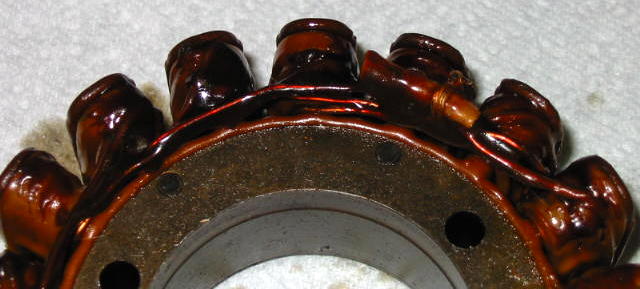
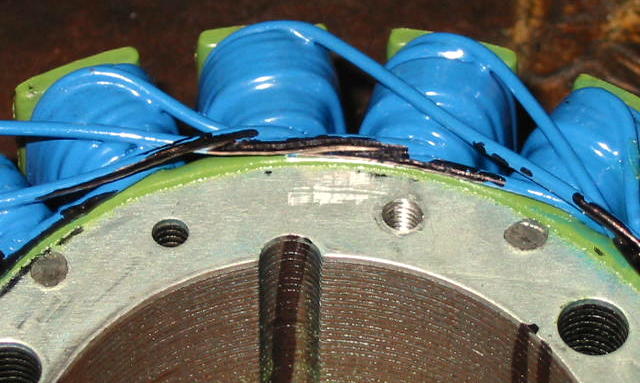
Here is a closeup view of the overheated wire turns.
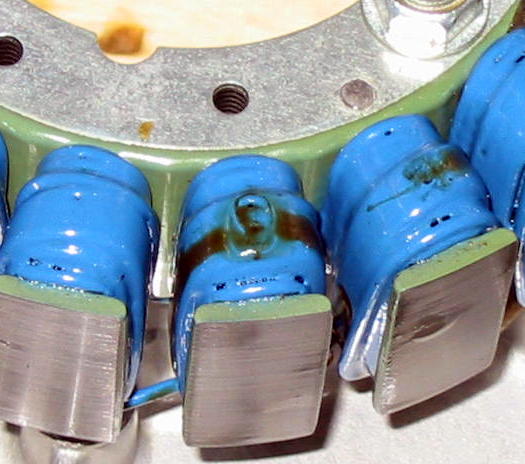
A wire underneath the stator can be seen touching the stator mounting
shoulder in this photo.
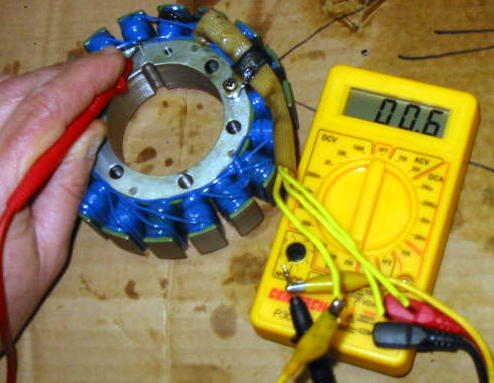
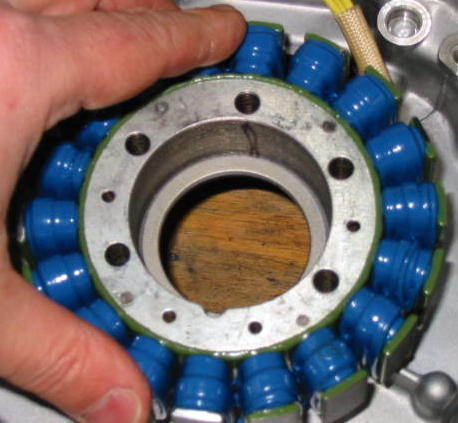
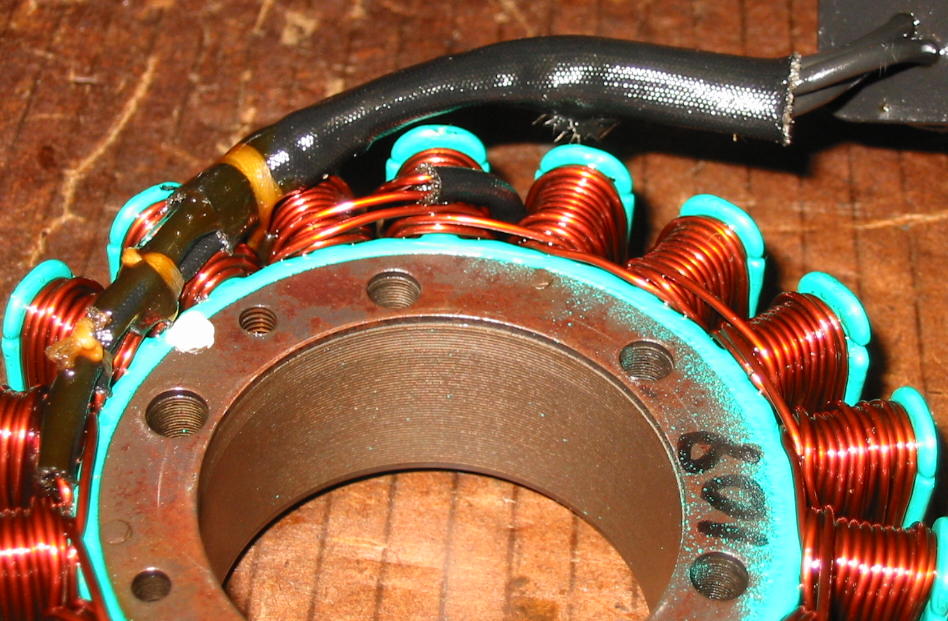
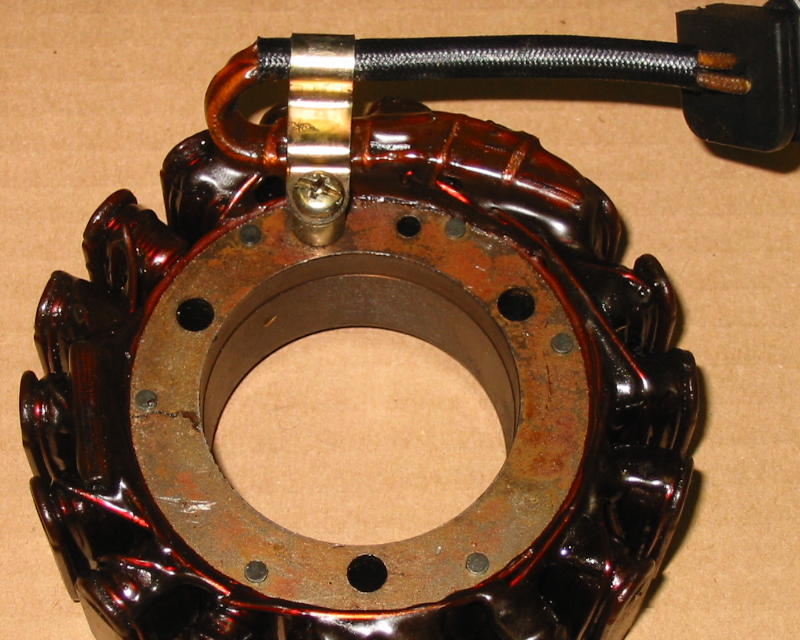
The stator was then removed from the rear engine case and set on the
workbench. The place where the wire touched the mounting shoulder can be easily
seen.
An Ohmmeter confirmed the short.
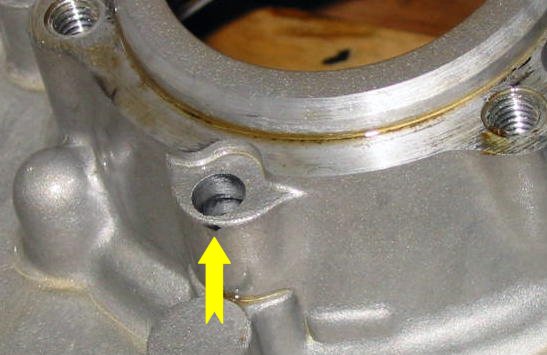
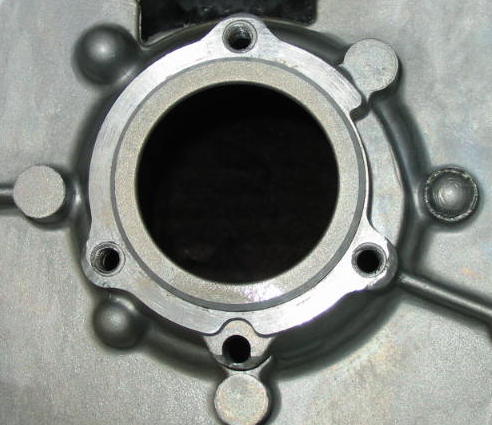
The corresponding location on the rear engine case mounting shoulder shows
evidence of burnt insulation where the wire made contact.
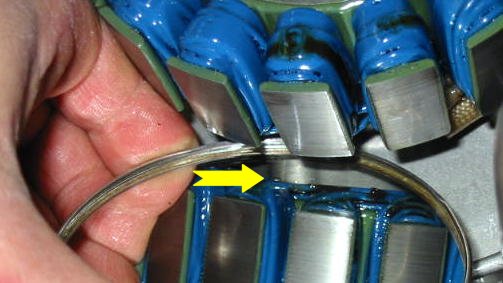
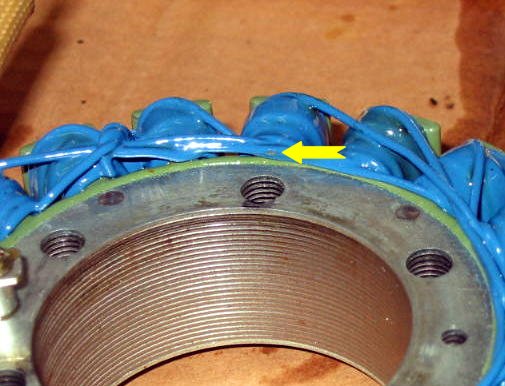
Another location was found where the stator wire made contact with the
mounting shoulder. A short circuit had not formed here yet but the wire
insulation was seriously deformed.
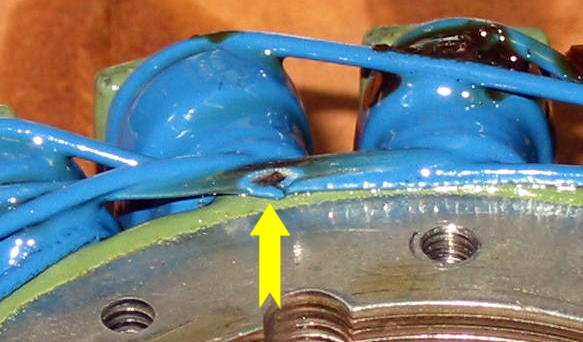
Yet another short circuit in the making can be seen here.
There are four locations where the problem is most likely to occur.
The wires between poles on the original Honda stator are routed to prevent
contact with the mounting shoulder.
For those folks contemplating a stator replacement, it would be prudent to ensure that the stator wires have plenty of clearance with the stator mounting shoulder. If there is any contact at all the insulation will likely fail due to vibration and rubbing. It's a lot of work to remove/disassemble/reassemble/replace an engine to replace a stator, and even more so to do it twice.
The Repair
The manufacturer of the stator, Electrosport Industries, was contacted and made aware of these findings. He offered to provide a replacement stator at no charge, which I accepted. The stator had performed well under heavy load for an extended period of time prior to the failure so I had no reservations about installing another one like it. Of course, steps had to be taken to prevent a recurrence of the problem.
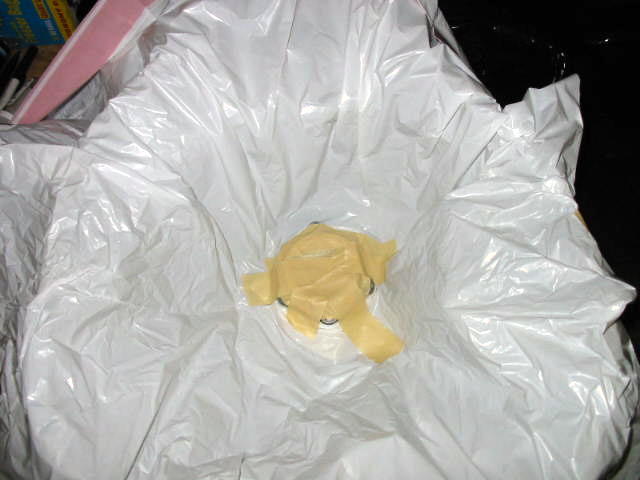
The inside rear engine cover was completely covered with a plastic trash bag
and masking tape except for the four locations where the stator wires would
most likely make contact.
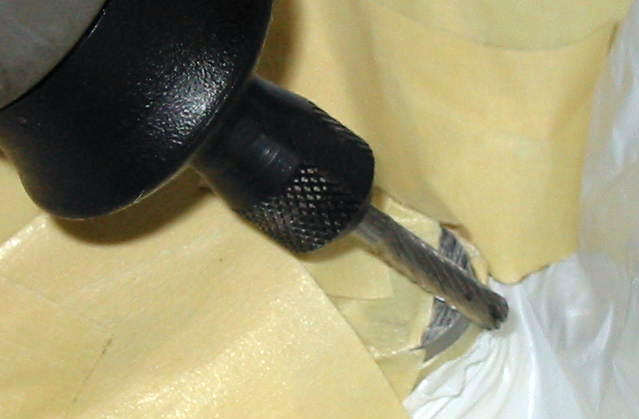
Next, a Dremel tool with a carbide burr was used to trim the sharp corners
at the four potential contact points.
The cutting operation created many metal filings. The vast majority of the
filings were caught with the plastic bag and masking tape, although a few
strays ended up inside the rear engine case. Much care was taken to ensure all
remaining filings were removed using multiple sequences of flushing with a
solvent, vacuuming, and blowing with compressed air. This is very important
because a single filing in the wrong place could destroy the engine.

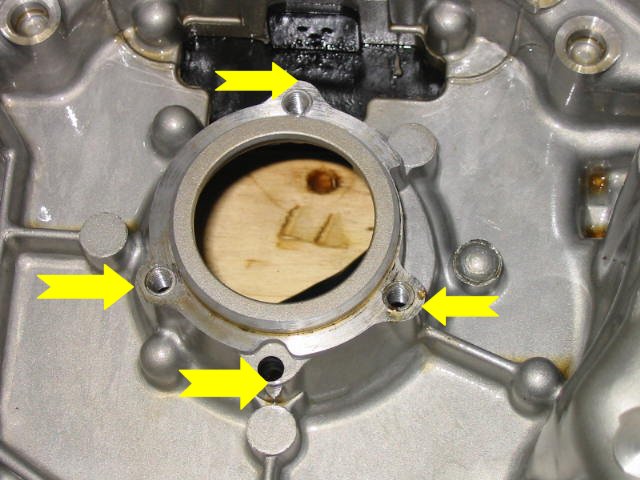
This is the mounting shoulder after the four corners were trimmed.
A black permanent marker was used to mark the replacement stator's wires
where rubbing would most likely occur.
A test fit was then performed. The stator was carefully set in place and
rotated slightly by hand while pressing sideways against the mounting shoulder
in all directions.
The stator was then removed and inspected for signs of rubbing as would be
indicated by scratching of the marker ink. No problems were found.
At this point the replacement stator was installed and the engine was reassembled and reinstalled in the bike. The charging system was tested and found to be working properly.
Testing continued in preparation for the upcoming extended trip.
I wish to especially thank Dan Topping for his excellent suggestions and comments. Dan correctly postulated the exact failure mode before I had even removed the engine and suggested the corrective action taken.
2015 Comment: The above modification was made in an attempt to utilize a replacement stator from Electrosport without experiencing a recurrence of the failure. A quality stator wound with adequate wiring clearance will not have this issue. Accordingly, I do not recommend this modification be performed. It is far preferable to obtain a stator without the clearance problem.
Subsequent Failure
I thought things were well in hand with the new stator and set out on the trip. About 1300 miles into the trip the new stator failed near Lubbock, TX.
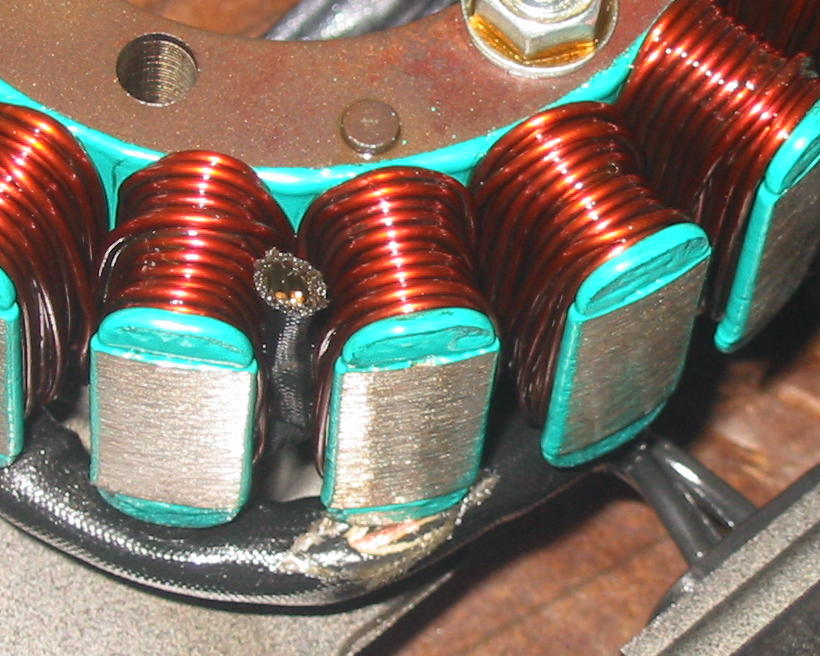
The failure mode was again a short to ground, but this time it was located on the side opposite the mounting shoulder.
This is definitely a manufacturing defect where the wire insulation chafed at the sharp corner of the pole.
Note the green insulating material. If it is consistently applied and relatively thick, it should provide some extra insulation and cushioning to reduce the likelihood that a wire winding could chafe against the sharp edge of a pole and short out to ground. In the above photo this insulation is either very thin or missing. Compare this photo to several of the others on this page and note the difference in insulation coverage.
At this point I could not envision installing another Electrosport stator. Honda has discontinued the stator so a new OEM stator was out of the question. A used stator from a low mileage parts bike was temporarily installed and thousands of miles were ridden with no further problems. This stator was subsequently replaced with a rewound unit from Custom Rewind, again as a preventive measure given the age of the used one.
The Custom Rewind stator has since had tens of thousands of miles on it with no problems.
Imminent Failure Example
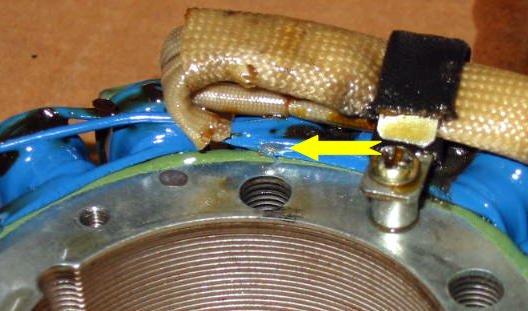
Here is an example of a stator failure about to occur. A replacement stator
was installed in a GL650. About 5K miles later the rear engine cover was
removed for an unrelated problem. The stator wire leads had been touching one
of the poles, and the constant rubbing under vibration had chewed through the
insulation on one of the leads. After a few more miles a charging system
failure would be virtually certain.
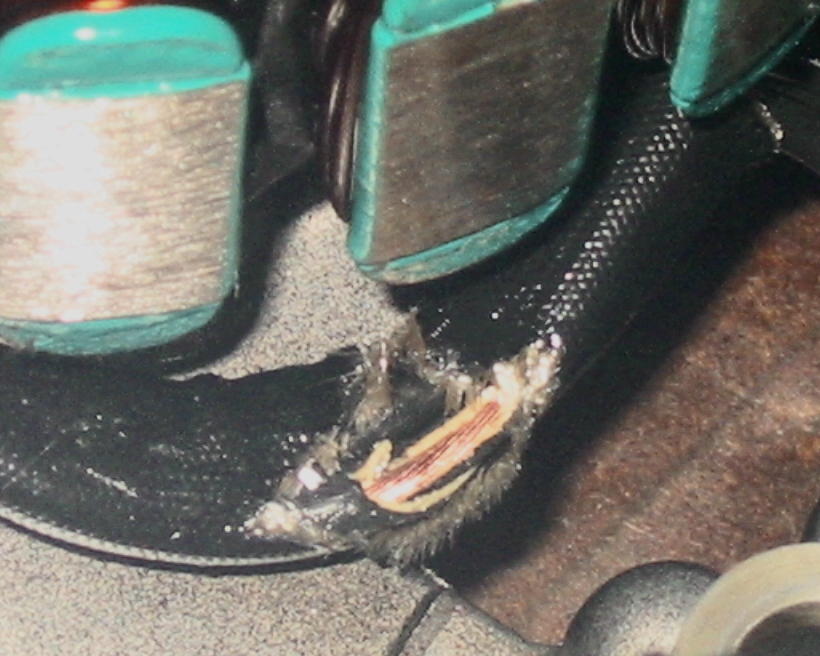
The wire sheath was secured with cable lacing in several places, but this was
not sufficient.
When installing a stator, care must be taken to ensure the wire leads are
adequately supported and that rubbing under vibration cannot occur. The
original Honda stator design has a metal clamp to prevent this from being a
problem.
Stator Rewinding
If and when the need arises in the future to have a stator replaced, my plans are to have a Honda stator rewound by a competent and reputable company specializing in rewinding stators. Several such sources are listed below.
Custom Rewind
Custom Rewind in Birmingham, Alabama has earned an excellent reputation among CX/GL owners for their high quality work in rewinding stators. I've heard nothing but praise for their work and they have my highest recommendation. Recently I had the opportunity to visit their facility and see their work first-hand; a write-up of my visit can be found here.
Their website appears to be new but they have been in business for quite a while. The preferred method of communication with them is by phone at 205-798-7282 or toll free at 800-798-7282.
Their mailing address is:
Custom Rewind
2014 Pratt Highway
Birmingham, AL 35214
West Country Windings
West Country Windings earned an excellent reputation among UK CX/GL owners for high quality rewinds over a period of many years. However, lately they seem to have experienced some quality issues and are therefore no longer recommended.
They can be reached at West Country Windings, 79 City Business Park, Somerset Place, Stoke, Plymouth, Devon PL3 4BB UK. Telephone +44-01752-560906.
Pitstop Motorcycles
Pitstop Motorcycles is a supplier currently recommended by UK CX/GL owners.
They can be reached at Pitstop Motorcycles Ltd., Pocket Nook Lane Industrial Estate, Lowton, Warrington, Cheshire, WA3 1AW UK. Telephone +44-01942-684684.
MOTEK
MOTEK is a German company that has been highly recommended for their stators.
They can be reached at MOTEK, Friedrich-Wilhelms-Bleiche 8a, D 33649 Bielefeld, Germany. Telephone +49-521-453744.
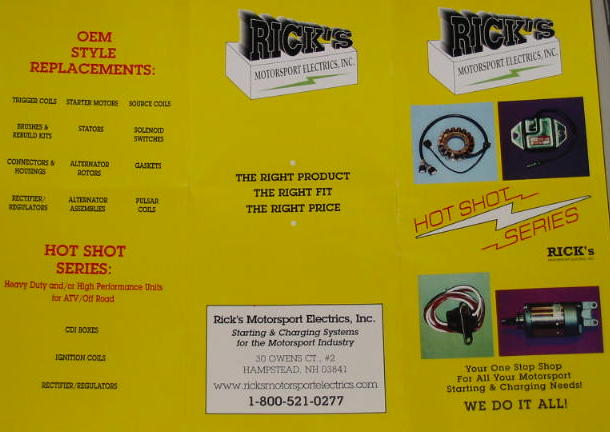
Rick's Motorsport Electrics
Rick's Motorsport Electrics is another source for stator rewinds.
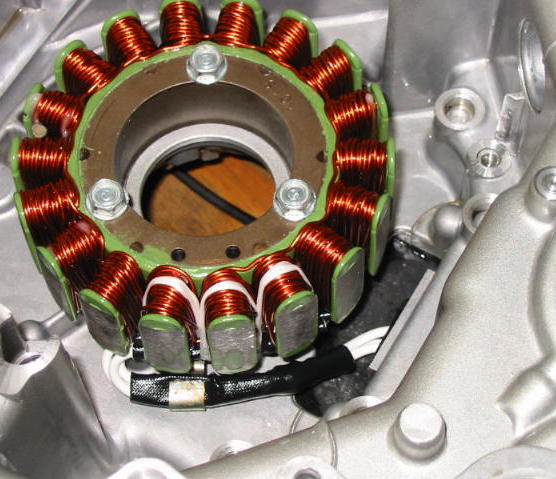
Rick's rewound a couple of stators for other bikes I own. The work appears to be of high quality as can be seen in the photos below. These stators have also proven to be very reliable, at least for me. I have heard of failures experienced by others on the Honda CX/GL Forum, though.
Update 6-15-2015: It has been reported on the forum that Rick's is now shipping imported stators from Taiwan (one of which failed after 200 miles) instead of the previously sold domestically-manufactured units.

The material on this web page may be freely copied and distributed.
Monitoring the Charging System
The stock Honda CX/GL bikes do not have a way to monitor the electrical charging system. My solution to this problem is described here.